How to submit images for an animal
This guide covers uploading (or picking) the art for an animal that has no preview yet, cleaning it up in the built-in image editor, and making the small wish-bubble icon.
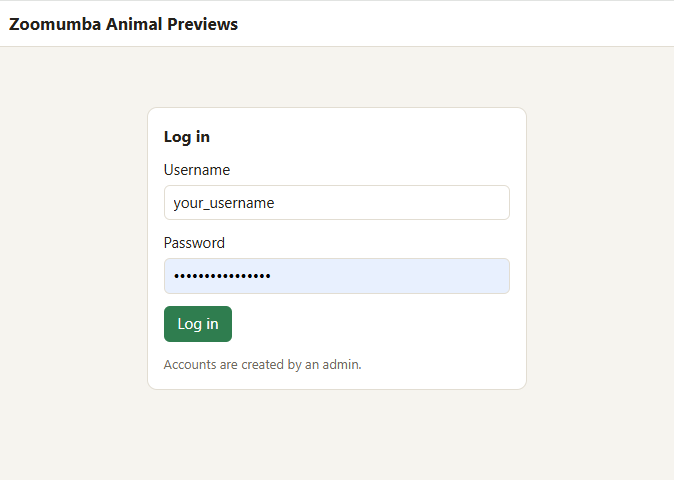
1. Log in
You can browse every animal without an account, but uploading needs a login. Click Log in in the top-right corner and enter the username and password an admin gave you. There is no sign-up page – ask an admin if you need an account.
2. Find an animal that needs art
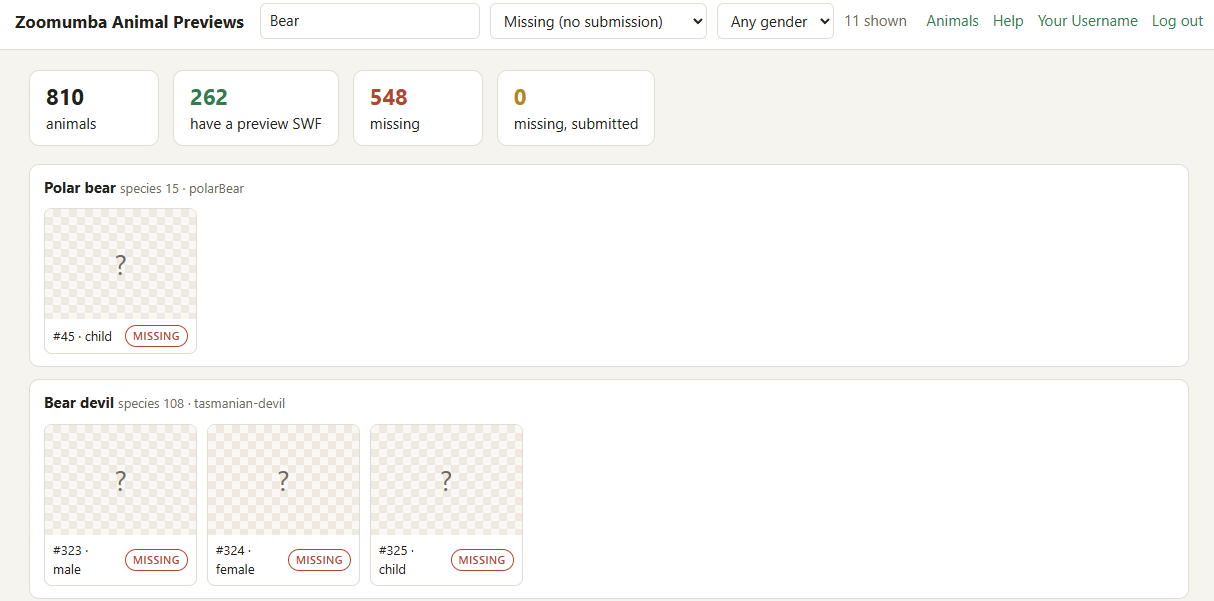
On the Animals page, set the status filter to Missing (no submission) and search for the animal by name, alias or id. Each card shows a badge:
| Badge | Meaning |
|---|---|
| swf | The animal already has a committed preview – nothing to do. |
| missing | No art yet – this is where help is needed. |
| submitted | Someone has uploaded art (or a SWF is waiting to be committed). You can still add a better version. |
Click a card to open the animal's page.
3. The submission form
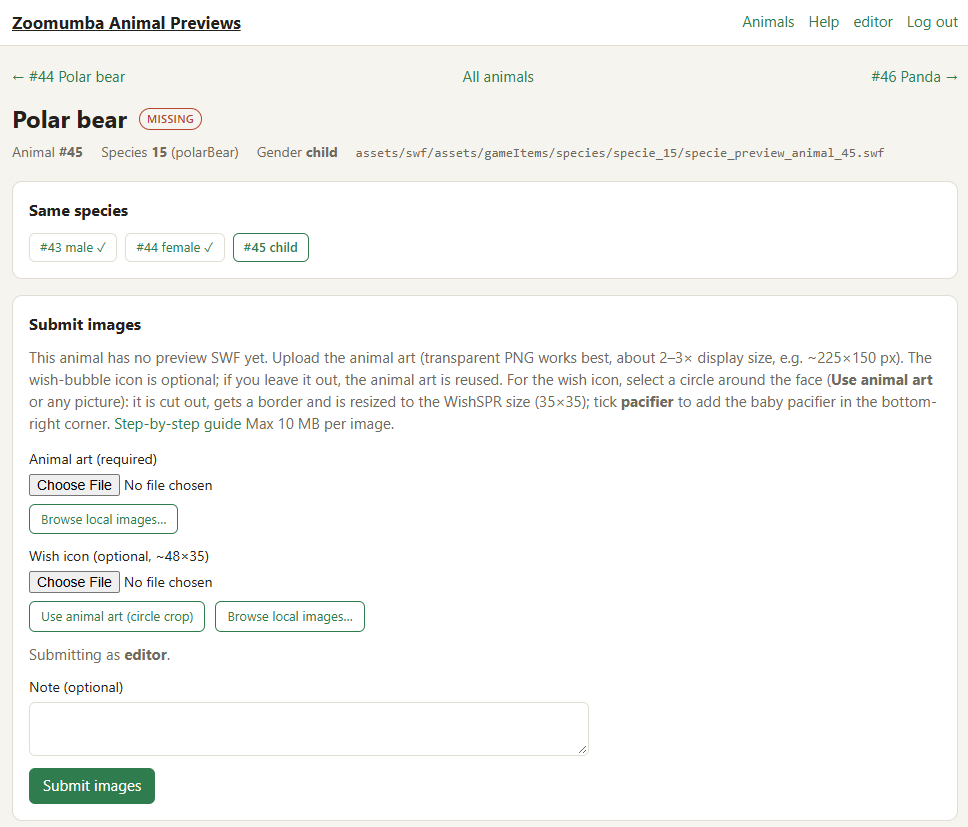
Scroll down to Submit images. There are two images per animal:
- Animal art (required) – the full animal. Transparent PNG works best, about 2–3× the size it shows in the game (around 225×150 px).
- Wish icon (optional) – the small round picture shown in a visitor's wish bubble. If you leave it out, the animal art is shrunk and reused.
4. Choose the animal art
You have two ways to get a picture in:
a) Upload a file from your computer
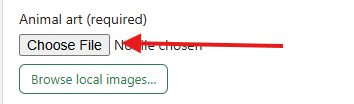
Click Choose File next to Animal art and pick a PNG, JPG, GIF or WebP (max 10 MB).
b) Pick from the local image library (no upload)
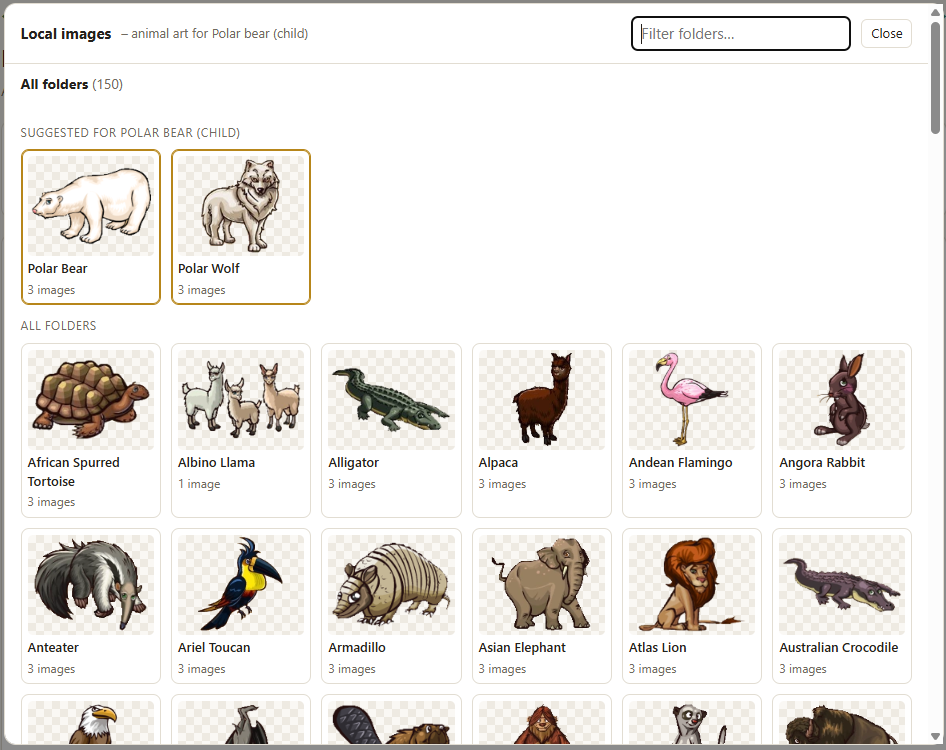
Click Browse local images…. A window opens with one folder per animal:
- Folders whose name matches this animal are listed first under Suggested.
- Type in Filter folders… to narrow the list.
- Each folder shows a thumbnail, the number of images and how many are already used.
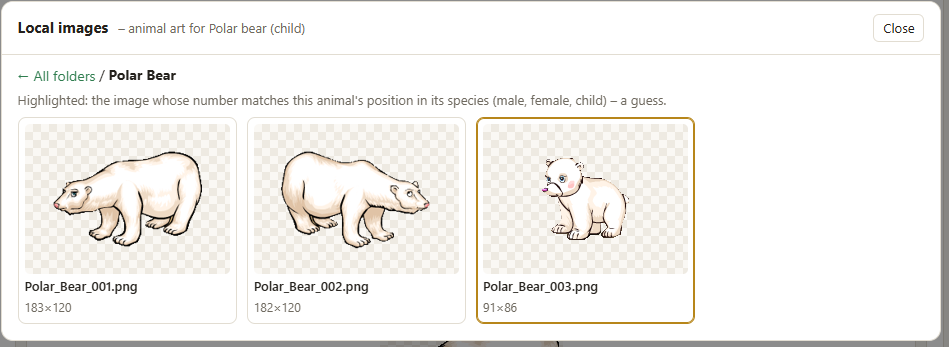
Open a folder to see every image in it. The image whose number matches this animal's position (male, female, child) is highlighted as a guess, and images already used by another animal say used by #…. Click an image to select it. The form then shows Selected: folder/file.png with a clear link.
5. Edit the animal art
As soon as an image is chosen, the Edit image panel opens below the field. Everything you do here changes the picture that gets submitted – the original file is not touched.
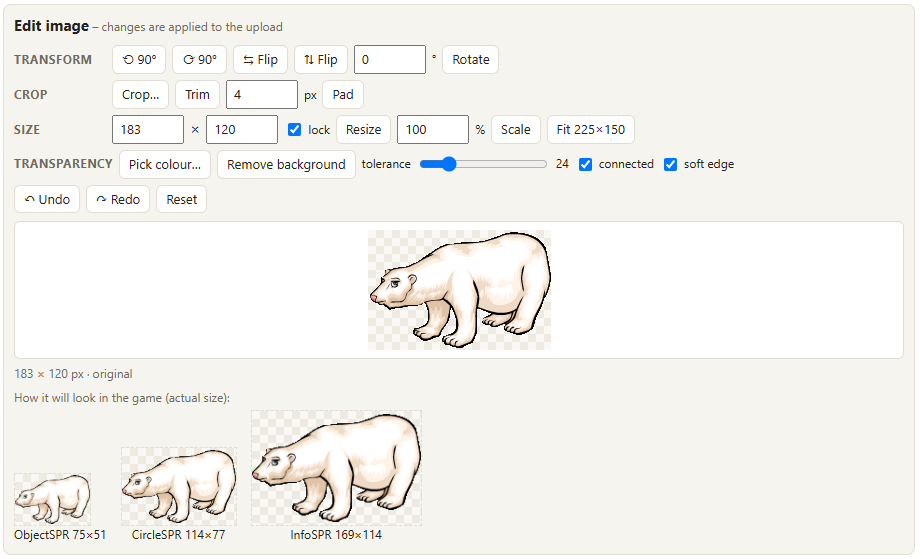
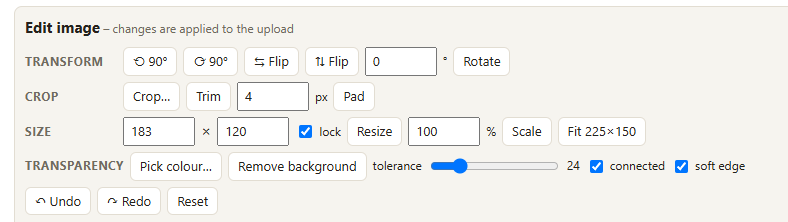
The toolbar is grouped by task:
| Group | Tools |
|---|---|
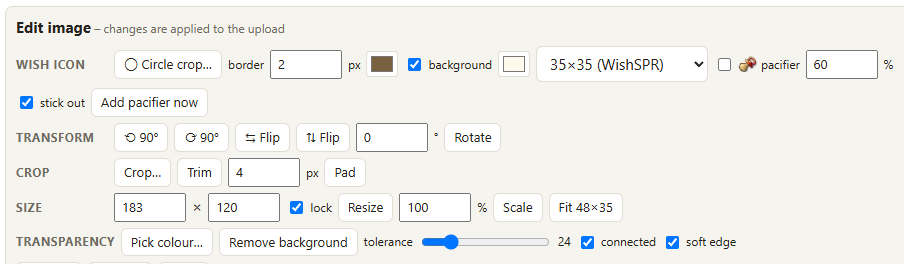
| Transform | ⟲ 90° / ⟳ 90° rotate, ⇆ / ⇅ flip, or type an angle and press Rotate |
| Crop | Crop… then drag a rectangle and press Apply crop; Trim removes empty transparent borders; Pad adds transparent space |
| Size | Type width × height (tick lock to keep the shape) and press Resize; Scale by %; Fit 225×150 shrinks to the recommended size |
| Transparency | Remove background clears the background connected to the four corners; Pick colour… then click a colour to make it transparent. Adjust tolerance, connected and soft edge if too much or too little disappears |
| ↶ Undo, ↷ Redo (Ctrl+Z / Ctrl+Shift+Z) and Reset to go back to the original |
A typical clean-up for a picture with a white background:
- Remove background – the white turns into the checkerboard (transparent).
- Trim – cuts away the empty edges.
- Fit 225×150 – shrinks it to a good size.
Use Crop… when the picture has more than the animal in it:
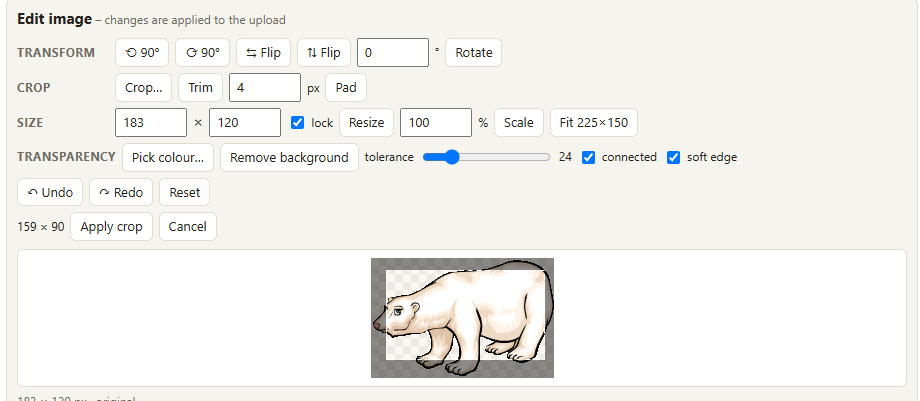
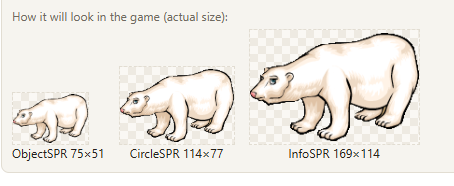
Under the picture, How it will look in the game shows the art at the exact sizes the game uses (ObjectSPR, CircleSPR, InfoSPR). Check that the animal is not too small or cut off.
6. Make the wish icon
The wish icon is a small circle with the animal's face, 35×35 px.
Start from the animal art
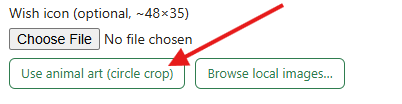
Click Use animal art (circle crop) next to Wish icon. The animal picture (with your edits) is copied into the wish editor, which opens in circle mode. You can also upload a separate file or use Browse local images… for the wish icon instead.
Select the face with the circle
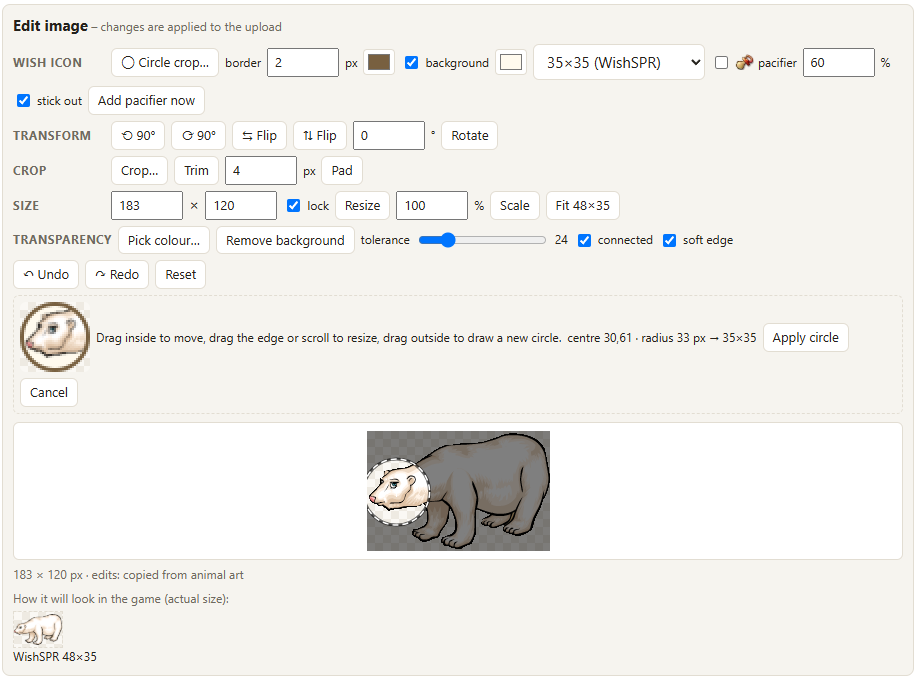
Everything outside the dashed circle is dimmed.
- Drag inside the circle to move it.
- Drag its edge (or scroll the mouse wheel over the picture) to make it bigger or smaller.
- Drag outside it to draw a new circle from that point.
The small preview on the left of the circle bar shows the finished icon as you go.
Border, background and pacifier
In the Wish icon row of the toolbar:
| Option | What it does |
|---|---|
| border px + colour | Width and colour of the ring around the icon (default 2 px, brown) |
| background + colour | Fills the circle behind the art with the colour. Off by default (transparent background) |
| 35×35 / 70×70 | Final size. 35×35 is the WishSPR size; 70×70 is a sharper version the game scales down |
| pacifier | Adds the baby pacifier in the bottom-right corner. Ticked automatically for child animals |
| % | Pacifier size, as a percentage of the icon height |
| stick out | Lets the pacifier overhang to the right of the circle (the icon becomes up to 48×35) |
| Add pacifier now | Puts the pacifier on the current image without a circle crop |
| outline px + colour | Draws an outline around the circle when it is applied; the pacifier is added afterwards, on top of the outline. The icon keeps its height. Default 1.5 px white, off |
| Add outline now | Outlines the current image straight away (without a circle crop). The picture grows by the outline width; the art itself is not resampled |
When it looks right, press Apply circle. The picture becomes the finished icon and the preview underneath shows it in the 48×35 WishSPR box.
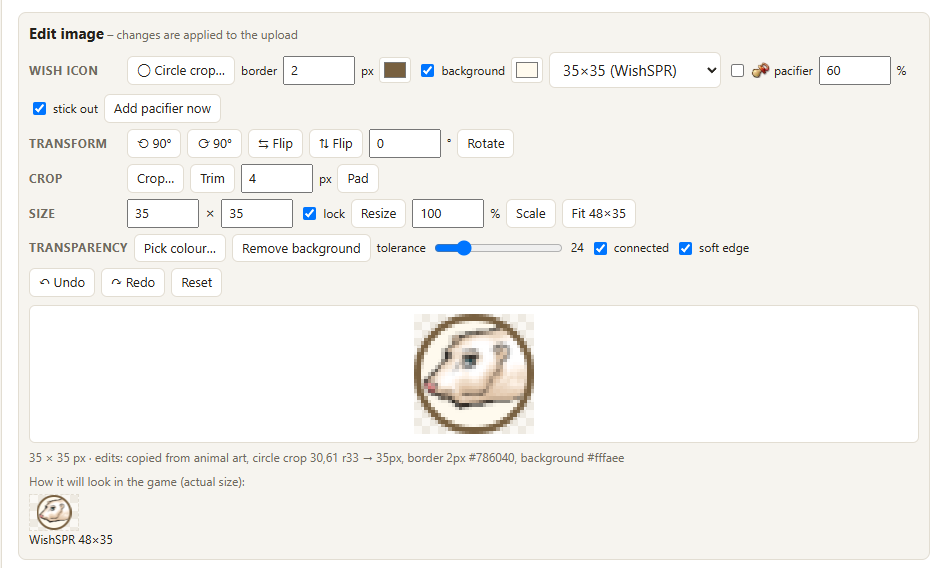
Changed your mind? ↶ Undo brings back the full picture and the circle.
7. Submit
Add a Note if there is something an admin should know (for example "male and female might be swapped"), then press Submit images.
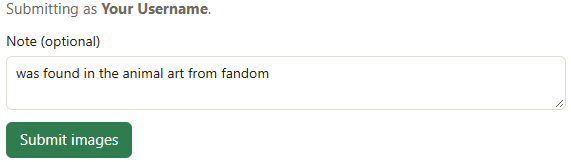
The page reloads with Thanks! Your images were saved. Your submission appears underneath with both images, your username and the time.
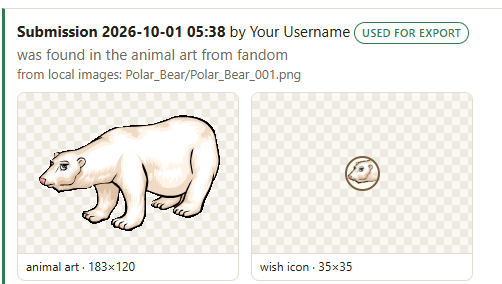
From there you can:
- Build SWF – make a test preview file (choose the engine first) and Download SWF it.
- Delete – remove your own submission.
- Admins can also mark a submission Use for export.
You can submit again at any time; an admin picks which submission is used.
Tips
- Transparent PNGs give the cleanest result. If your picture has a plain background, use Remove background first, then Trim.
- Bigger is better for the animal art – the info window shows it at more than twice the normal size. Shrink with Fit 225×150 rather than uploading tiny images.
- Check the game previews under the editor before submitting.
- For the wish icon, keep the whole face inside the circle with a little space around it; the border covers the outermost pixels.
- Everything you do is recorded with your username in the audit log, including the list of edits, so admins can see how an image was made.
Troubleshooting
| Problem | What to do |
|---|---|
| No Submit images form | You are not logged in, or the animal already has a committed preview. |
| "Upload rejected: not a readable image" | The file is not a supported image. Re-save it as PNG. |
| "Upload too large" | Images are limited to 10 MB each. Scale it down first. |
| The editor does not appear | Make sure JavaScript is enabled and you are using a current browser (Chrome, Edge, Firefox). |
| Too much of the animal disappeared | Undo, lower the tolerance, or tick connected so only the background area is removed. |
| "MongoDB unavailable" banner | The server's database is down; submissions are disabled until it is back. Tell an admin. |